This section of the documentation explains the flow and functionalities available to the Applicant.
The representative will always know how many steps remain to complete the KYB process thanks to the flow diagram displayed at the top of each screen. It is necessary to click the Accept button on each screen to proceed with the flow. Clicking Back will return to the previous step.
Company Information
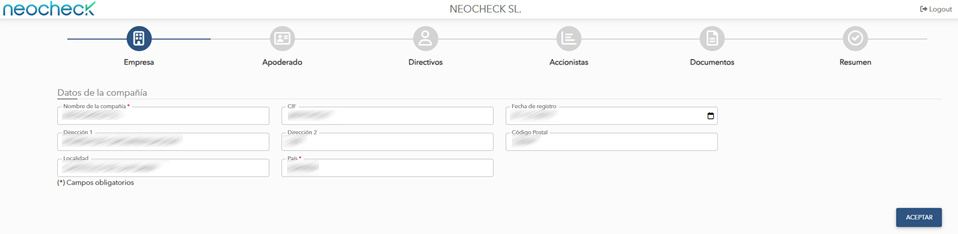
In this section, the applicant can verify and modify the company data for the KYB process.
If the essential information provided by the manager is incorrect, the representative can correct it by clicking the Edit button. Clicking the Continue button will save the changes.
Representative's KYC Process
After reviewing the information, the representative must select the type of identification chosen for the KYC process. The options are:
- Digital certificate
- KYC Process via Video Identification
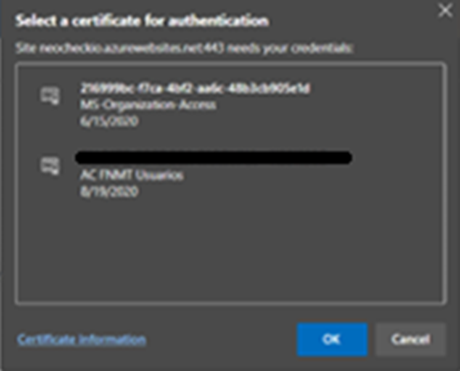
Digital certificate
When this option is selected, the browser displays a pop-up window with all valid certificates for the representative (Personal, Company Representative) installed on the computer. Clicking on one from the list will complete the identification if the required data is correctly extracted. Otherwise, a message will appear on the screen, and another type of identification must be selected.
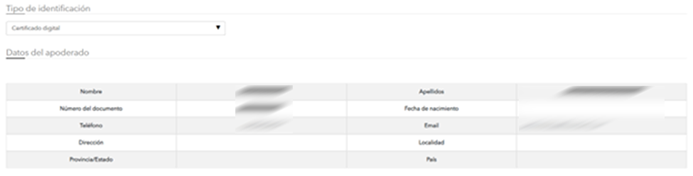
If the certificate data is extracted, a table displaying the representative’s information will be shown.
Proceso KYC por vídeo identificación
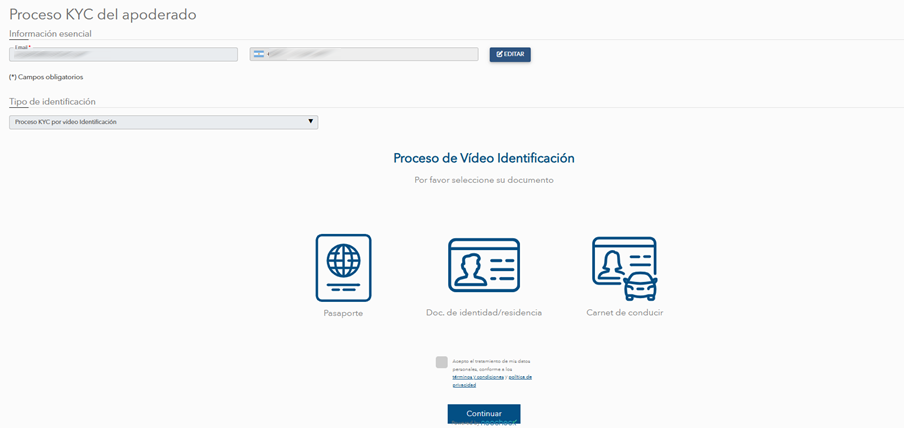
If this option is selected, the representative will need to complete a video identification process following the instructions displayed on the screen.
Once completed, it will display a message to proceed.
Executive Positions
The list of executive positions (directors and board members) corresponding to the verification company will be displayed in a table. The representative can add new directors or remove them from the list.
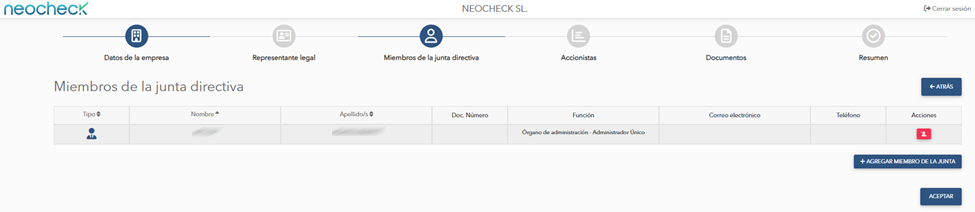
| Icon | Meaning |
| Individual executive | |
| Corporate executive |
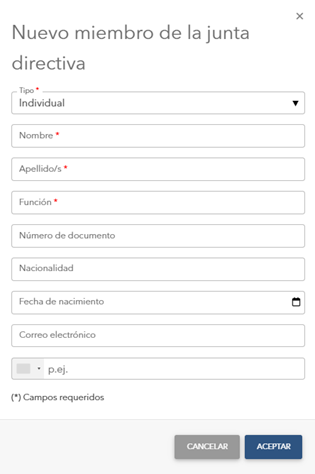
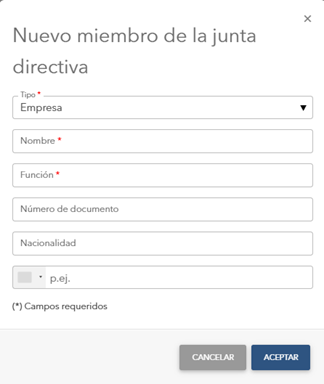
Create Executive Position
To create a new executive position, the representative must click the Add Executive Position button and fill out the pop-up form. The new executive can be an individual or a company. Fields marked with a red “*” are mandatory.
Update Executive Position
The representative can only modify the data of directors and board members that were manually created by using this button ![]() of the corresponding row.
of the corresponding row.
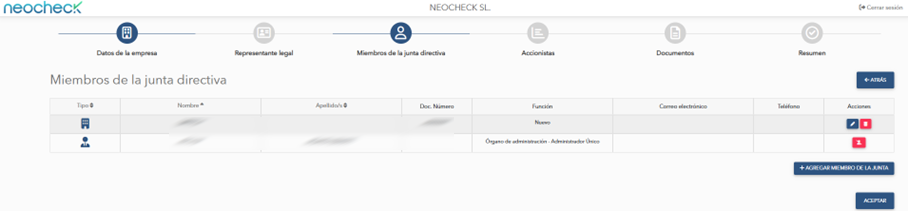
Disable Executive Position
To remove an executive position from the list, the representative must click this button ![]() in the corresponding row. If the executive was created manually, they will be deleted. If the executive was automatically loaded by the process, they will be disabled, and the representative must provide a reason in the pop-up window.
in the corresponding row. If the executive was created manually, they will be deleted. If the executive was automatically loaded by the process, they will be disabled, and the representative must provide a reason in the pop-up window.
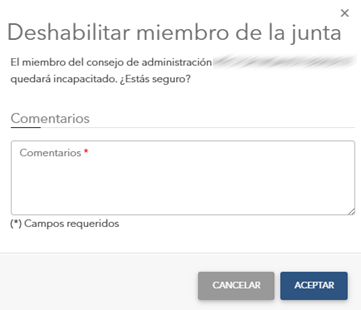
For manually created executive positions, confirmation will be required before deletion.
Enable Executive Position
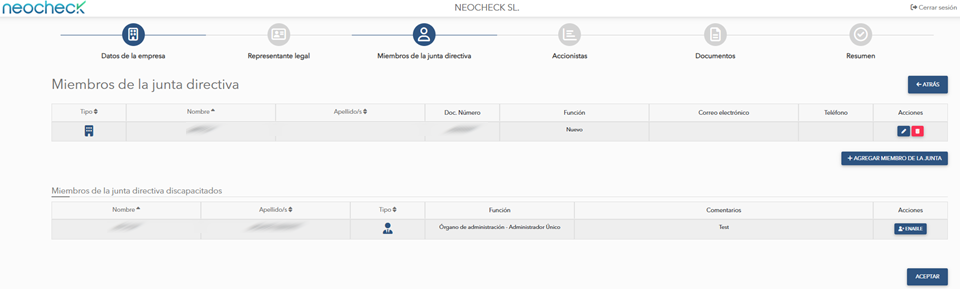
The representative can view disabled executive positions and enable them again in the transaction by using the Activate button in the corresponding row. This action must be confirmed in a pop-up window.
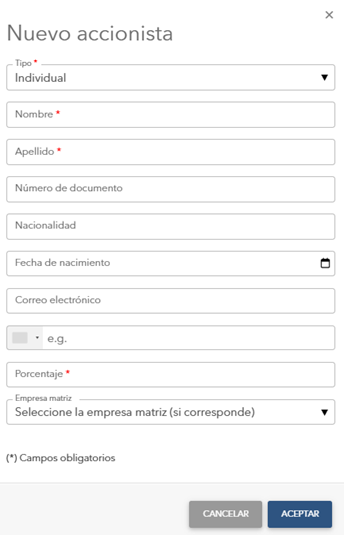
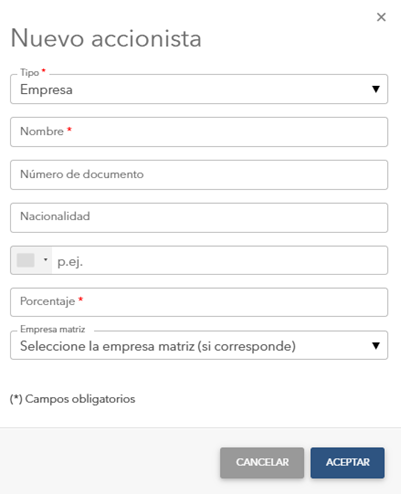
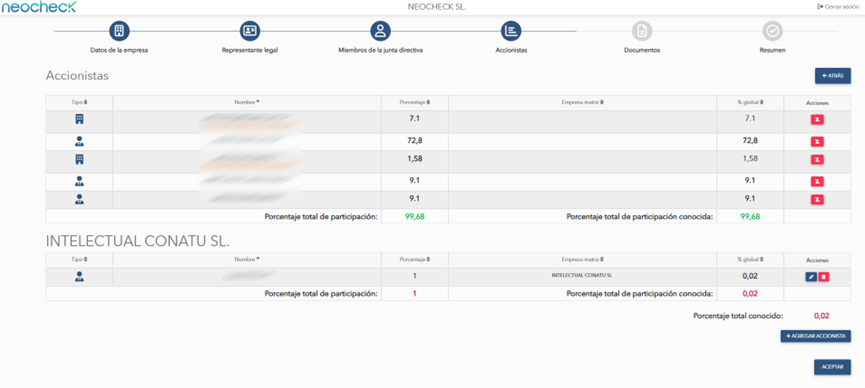
Shareholders
The list of shareholders corresponding to the verification company will be displayed in a table. The representative can add new shareholders or remove them from the list.

| Icon | Meaning |
| Individual Shareholder | |
| Corporate Shareholder |
Create Shareholder
To create a new shareholder, the representative must click the Add Director button and fill out the pop-up form. The new shareholder can be an individual or a company. Fields marked with a red “*” are mandatory.
Update Shareholder
El apoderado sólo puede modificar los datos de los accionistas creados manualmente utilizando este botón ![]() of the corresponding row.
of the corresponding row.
Cabe destacar que si el accionista está asociado con otro accionista jurídico (empresa), se vera en una tabla aparte de la principal junto con otros accionistas asociados a dicha empresa.
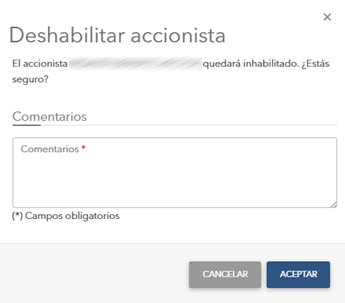
Deshabilitar accionista
The representative can only modify the data of shareholders that were manually created by using this button ![]() in the corresponding row. If the shareholder was created manually, they will be deleted. If the shareholder was automatically loaded by the process, they will be disabled, and the representative must provide a reason in the pop-up window.
in the corresponding row. If the shareholder was created manually, they will be deleted. If the shareholder was automatically loaded by the process, they will be disabled, and the representative must provide a reason in the pop-up window.
For manually created shareholders, confirmation will be required before deletion.
Enable Shareholder
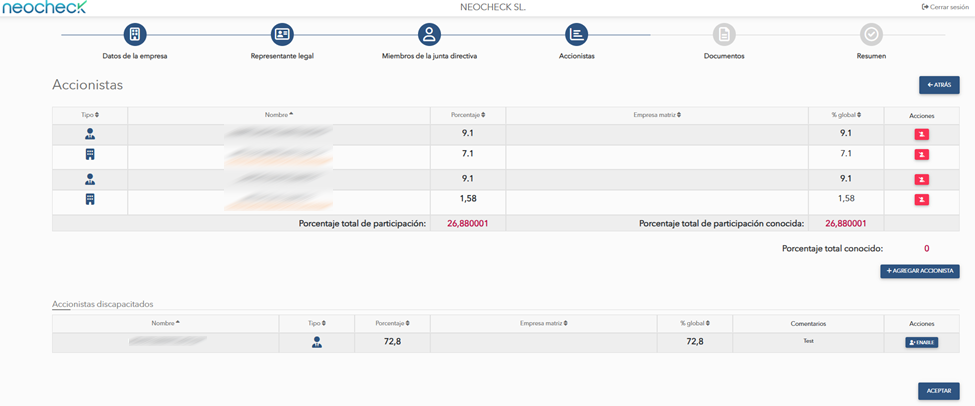
The representative can view disabled shareholders and enable them again in the transaction by using the Activate button in the corresponding row. This action must be confirmed in a pop-up window.
Additional Documentation
The representative can upload files to provide additional information for the company verification. If no documents are to be uploaded, the default entry displayed on the screen must be removed by clicking the Delete button. The same procedure applies to deleting any documents uploaded by mistake.
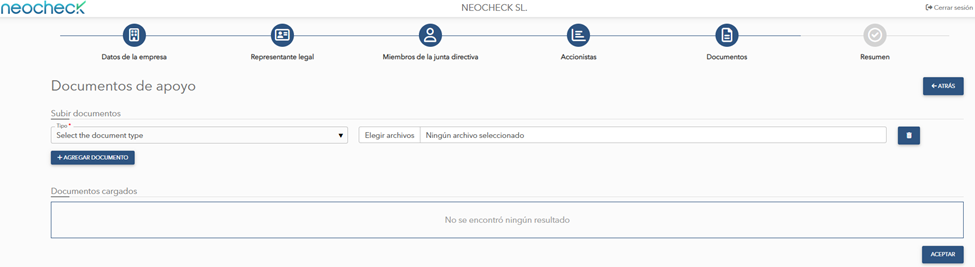
The types of documents that can be selected are:
- Certificate of Incorporation
- VAT
- Power of Attorney
- Others
The user can add more than one document at the same time by clicking the Add Document button.
Summary
In this step, the representative can view all the information provided for the company verification in the previous steps. They can open each section to review the data.

To complete the process and submit the verification for review, the representative must accept the sworn statement and click the Accept button. Additionally, they can add comments for the review. Once the representative clicks the Accept button, the verification will be sent for review.
The final screen will be displayed automatically once the verification data is saved.