When a user uses the NeoCheck functionality within their app, they experience the following steps:
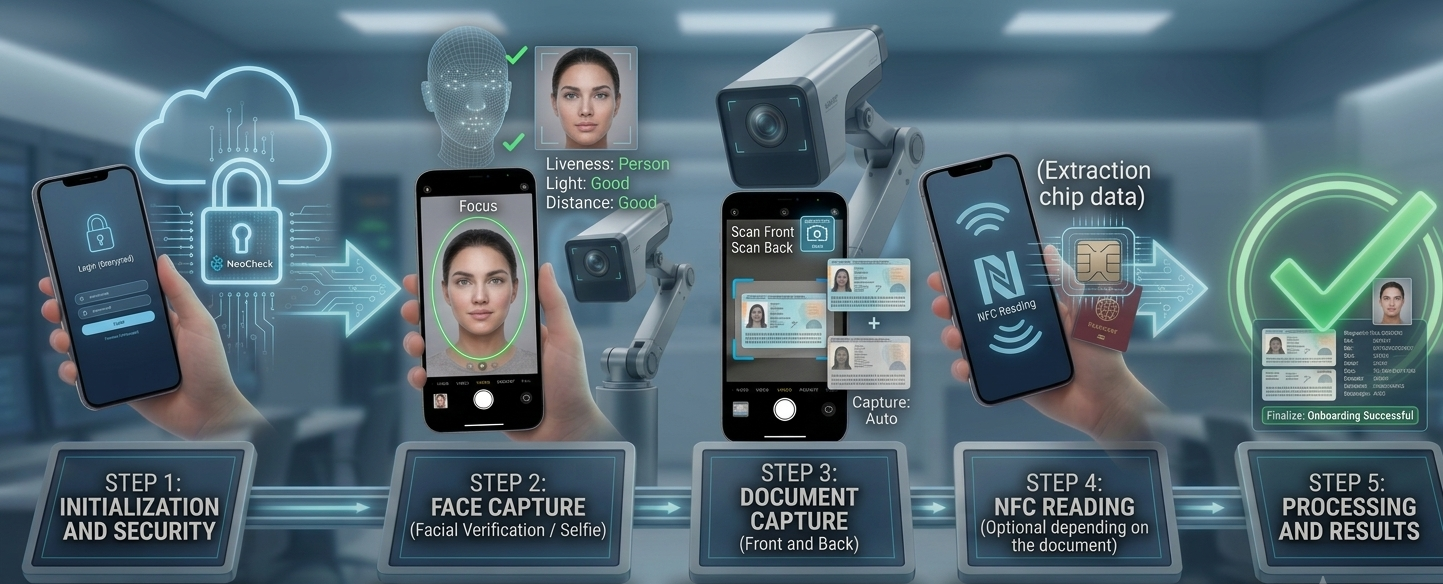
Step 1: Initialization and Security: Your application starts up the module using the credentials provided by the client. After that, the SDK takes care of sending them encrypted to NeoCheck's servers, ensuring the authenticity and secure authorization of the service.
Step 2: Face Capture (Facial Verification / Selfie): Right after the documents, the camera switches to the phone's front sensor to capture the user's face. The SDK activates a visual guide (usually a floating oval) and analyzes the image locally to make sure it's a real, live person (preventing the use of printed photos or video screens) and ensures the lighting conditions are optimal for the later biometric comparison against the document.
Step 3: Capturing the Document (Front and Back): A special camera interface with an adaptive viewing frame is displayed. The SDK's local engine continuously evaluates the video in real time. When it detects that the document is perfectly centered, focused, and free of reflections or shadows, it automatically takes the photo. The user goes through this process for both the front and back of the document.
Step 4: NFC Reading (Optional depending on the document): If the scanned document has an electronic chip (contactless), the user is asked to bring the document close to the back of the mobile phone. The SDK activates the radio frequency sensor to wirelessly extract the biographical information and the original high-resolution photograph that is factory-encoded, protecting the process against physical tampering.
Step 5: Processing and Results: After completing the local capture steps, the SDK closes automatically and the system issues an instant diagnosis determining the success of the operation. It returns to the parent application all the structured information (optimized images of the document, validation selfie, data extracted from the chip or the MRZ) ready to complete the customer onboarding process securely.