In this section, the configurations of the processes associated with the companies will be described. The user in charge of editing the company can also configure the following actions by expanding them.
Verification Configuration
In this section, the behavior of the verification process can be configured.
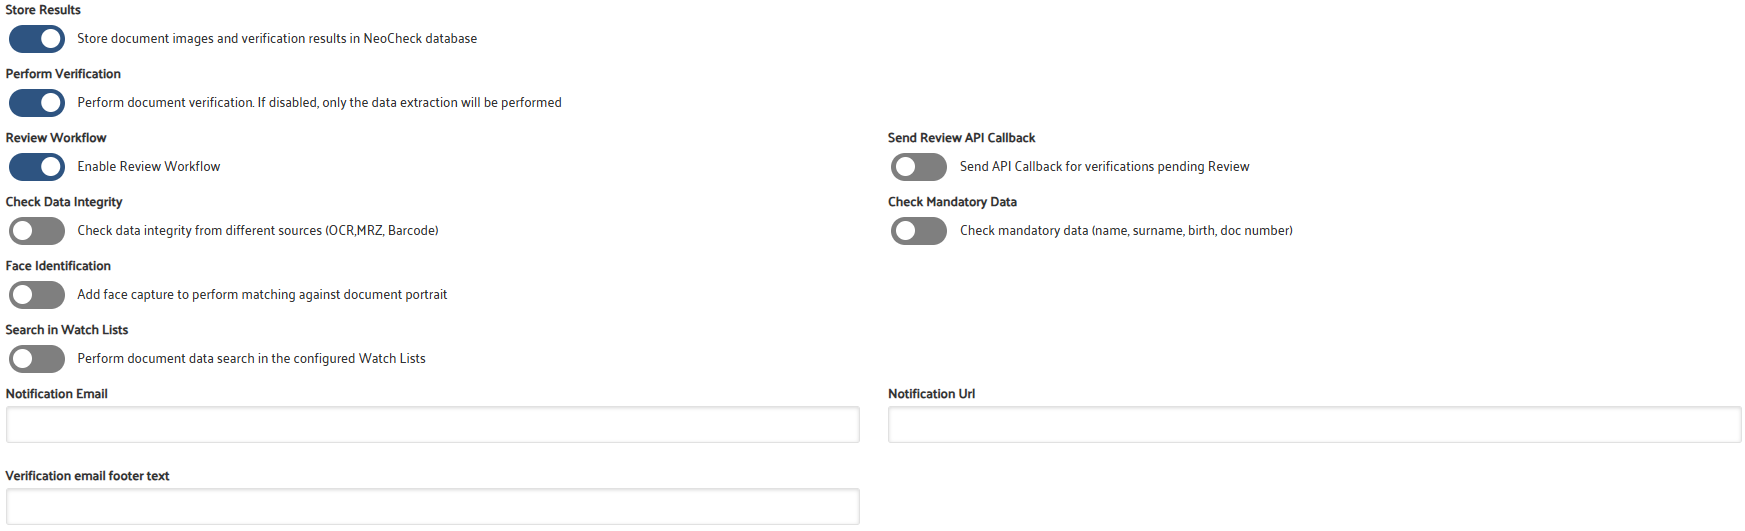
Options:
- Save Results: Enables or disables the storage of document images and verification results in NeoCheck's database.
- Perform Verification: Activates or deactivates the execution of verifications on the document. If deactivated, only data will be extracted without performing any verifications.
- Review Workflow: Activates or deactivates the review workflow, which allows detected errors to be flagged for later review.
- Check Data Integrity: If enabled, it will perform data verification, including OCR, MRZ, and CB.
- Face Identification: Activates facial image capture and facial verification against the document.
- Search in Watchlists: Activates the search of the document in AML (Anti-Money Laundering) watchlists.
- Send Review Notification via API: Allows sending notifications via API for verifications that are pending review.
- Check Required Data: Enables the verification of required data, such as name, surname, date of birth, and document number.
- Facial Record List: Selects the list where biometric data obtained during verifications will be stored.
- Notification Email: Enter an email address where notifications for each completed verification will be sent.
- Notification URL: Specifies the URL to which a POST request with the notification of the results will be sent.
- Notification Email Footer Text: Allows adding text to the end of the notification email.
Custom KYC Configuration
In this section, the appearance of the platform can be configured with the company's name and colors.

Fields:
- Company display name: Field for the trade name.
- Custom Domain: The tool allows configuring a custom domain.
- Title Color: This field configures the title color using its hexadecimal code.
- Subtitle Color: This field configures the subtitle color using its hexadecimal code.
- Logo: Clicking the Change logo button will open a browser to upload the desired logo.
Report Certificate Configuration
In this section, the appearance of the verification report can be configured if you want to generate one at the end of the process.
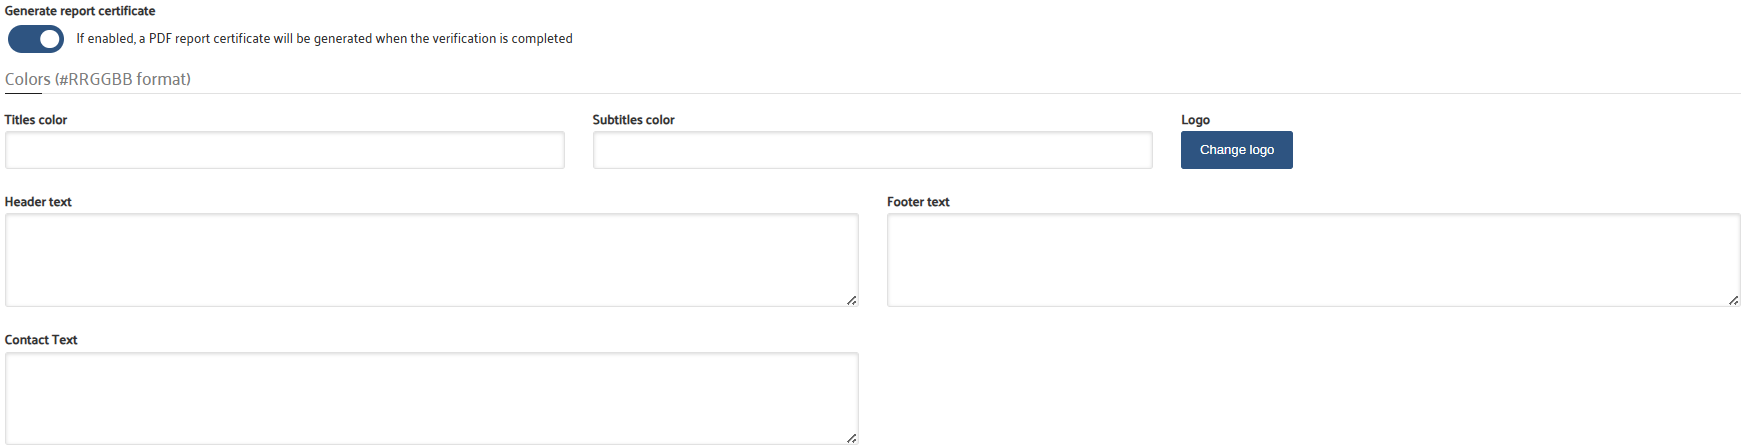
Options:
- Generate Verification Certificate: This option allows enabling the generation of a PDF report with the verification data upon completion.
- Title Color: This field configures the title color using its hexadecimal code.
- Subtitle Color: This field configures the subtitle color using its hexadecimal code.
- Logo: Clicking the Change logo button will open a browser to upload the desired logo.
- Header Text: Configures the header text of the report.
- Footer Text: Configures the footer text of the report.
- Contact Information: In this text area, you can place contact information that will be displayed in the report.
Video Identification Configuration
Similar to the custom KYC configuration described above.
Additionally, other values affecting the video identification process can be configured.
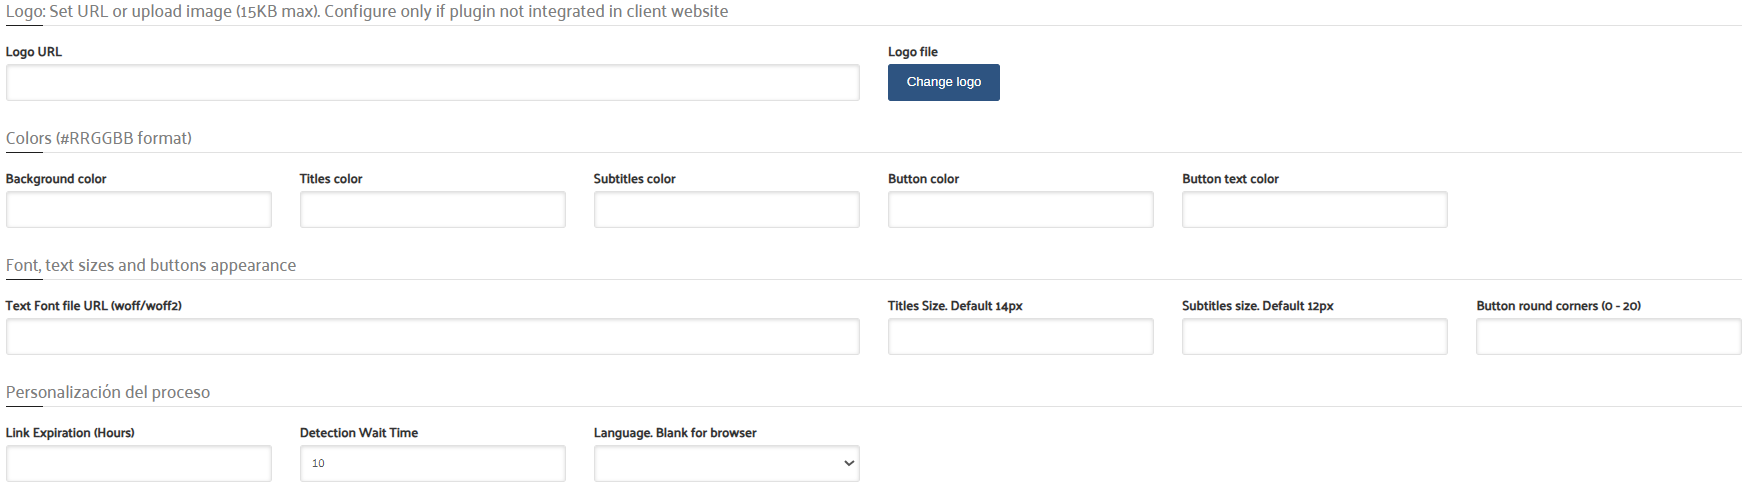
Parameters:.
- Logo URL: Enter the URL of the logo image to be displayed in the module.
- Logo: Use the Change Logo button to open a file explorer and upload the desired logo.
- Background Color: Configure the background color using its hexadecimal code.
- Title Color: Define the color of the titles using its hexadecimal code.
- Subtitle Color: Configure the color of the subtitles using its hexadecimal code.
- Button Background Color: Set the background color of the buttons using its hexadecimal code.
- Button Text Color: Configure the text color on the buttons using its hexadecimal code.
- Typography URL: Customize the module's typography by entering the URL of the desired typography library.
- Title Size: Define the size of the titles in pixels. The default value is 14px.
- Subtitle Size: Define the size of the subtitles in pixels. The default value is 12px.
- Button Corners: Configure the rounding of the button corners. For a fully rounded corner, set the value to 20.
- Link Expiration: Set the number of hours that the link should remain active before expiring.
- Detection Timeout: Define the number of seconds the application will wait to perform detection in video for documents, people, etc.
- Language: Select the language for the Video Identification prompts from the dropdown list. If left blank, the default language will be selected automatically.
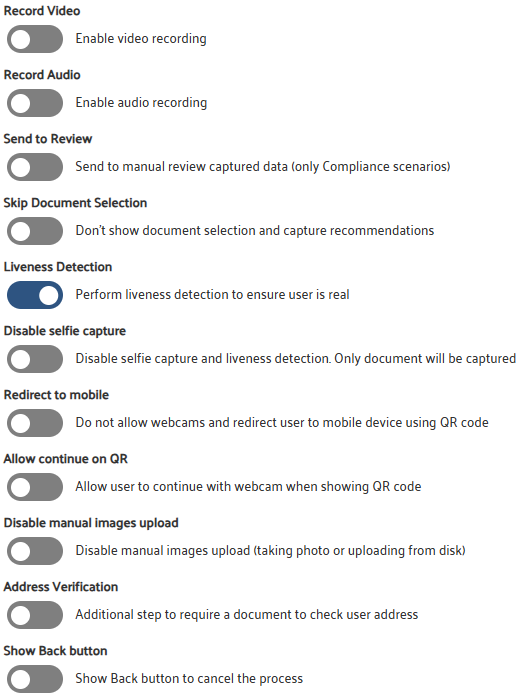
- Video Recording: Enables video recording throughout the entire identification process.
- Audio Recording: Allows audio recording throughout the entire identification process.
- Send for Review: Sends all verifications with issues for review.
- Do Not Show Document Selection: Disables the reference frames for document capture.
- Liveness Detection: Activates or deactivates liveness validation.
- Disable Face Capture: Deactivates facial image capture and liveness detection. Only the document will be captured.
- Redirect to Mobile Device: Disables the use of webcams and redirects the user to a mobile device by displaying the QR code.
- Allow Continue with QR: Allows the user to continue using the webcam even when the QR code is displayed.
- Disable Manual Image Upload: Disables the ability to manually upload images from the device.
- Verify Postal Address: Adds an additional step in the verification process to request a document that confirms the postal address.
- Show Back Button: Activates a Back button that allows canceling the ongoing process.

- Redirect URL on Completion: Configures the URL to which the user should be redirected upon completion of the validation process.
- Error Redirect URL: Configures the URL to which the user should be redirected in case of an error during validation.
- API Notification URL: Specifies the URL to which a POST request with the notification of the results will be sent.
- Include Binaries: If enabled, the images captured will be included in Base64 format in the notification.
Watch List Configuration
In this section, set the values necessary for matching identifications with Control Lists. Indicate which lists will be activated for searches.

- Comparison Accuracy: Defines the level of accuracy required for comparing names with watchlists.
- Acceptance Threshold: Configures the minimum percentage required for the verification to be accepted and proceed with the process.
- Continuous Monitoring: Activates or deactivates notifications about changes to registered individuals.
- Monitoring Notification URL: Specifies the URL to which a POST request with monitoring notifications will be sent.
- Notification Email: Enter an email address where monitoring notifications will be sent.